Quick Covid Mask – MERV 13
We’ve all heard about the shortage of masks for our health care workers. Do your part, leave the N95s on the shelves for our nurses. To help, here are a couple of design alternatives you can make at home for personal use. First, there are two designs you can try if you have a 3D printer. Then I show the no-machine, no-frills design. Both use slices of MERV-13 as their filter material. Make sure you don’t use the FiberGlass Filters! There is a link to filer material on Amazon below.
Before we start – here is the FDA Guidance on 3D printed masks:
Please review this section from that document:
Q. What should health care providers do if using a 3D-printed mask?
A. Health care providers should:
- Check the 3D-printed mask’s seal for leaks.
- Confirm that they can breathe through any makeshift filter materials.
- Exercise caution in surgical environments where the need for liquid barrier protection and flammability is a concern.
- Recognize that the mask may not provide air filtration enough to prevent transmission of infectious agents.
- Safely dispose of infectious materials and disinfect any part they intend to reuse.
Design 3D: Awesome 3D mask – tested – its wonderful:
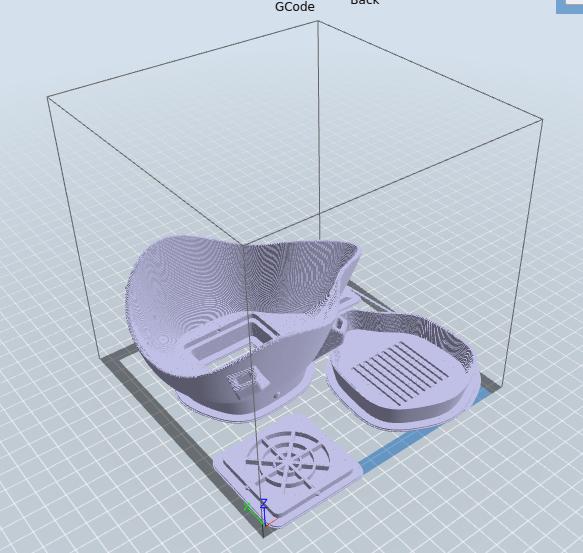
A mask that fits 150x150x150mm PLA printer:
https://www.givewavestudios.com/freebies/
See more resources on youtube.
GCode for 3D printing:
Here is the GX I made if you want to give it a go on your printer:


Insulation that works with this mask:

(Source: Amazon.com)
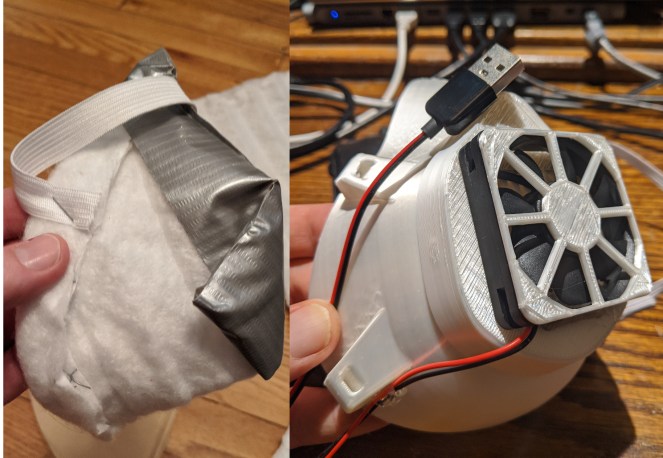
3D Printed Mask w/Insulation:


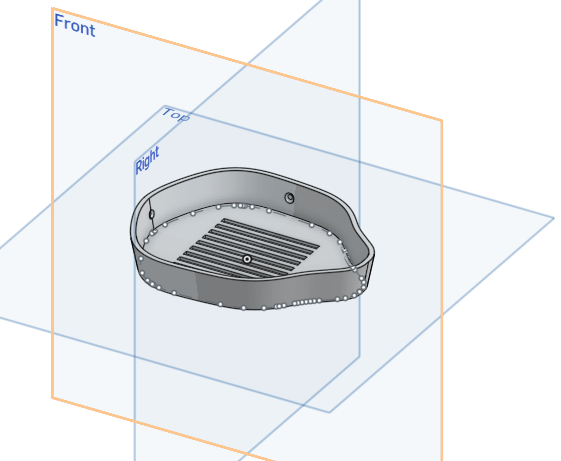
OnShape Model of the Nose Cap
Here is an OnShape recreation of the nose cap – in case you want to remix your own.
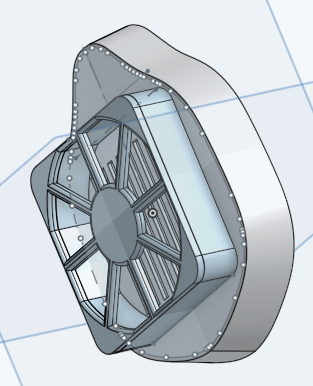
OnShape Model of the Nose Cap With integrated Fan
Here is an OnShape recreation of the nose cap with FAN. This will allow for those with breathing issues to use this mask a little easier. The fan in use can be ordered from mouser (any 50mm/50mm 5V fan will likely work):

Design Mad Max: No Frills, No Machine. The, well-that-was-easy mask:
Introducing the “well-that-was-easy” mask. This utilizes Merv 13 Filters from Amazon but requires FAR less technical skill to build. In fact, the pattern is a #4 coffee filter:

First a little detail on Merv-13 (not hospital grade):
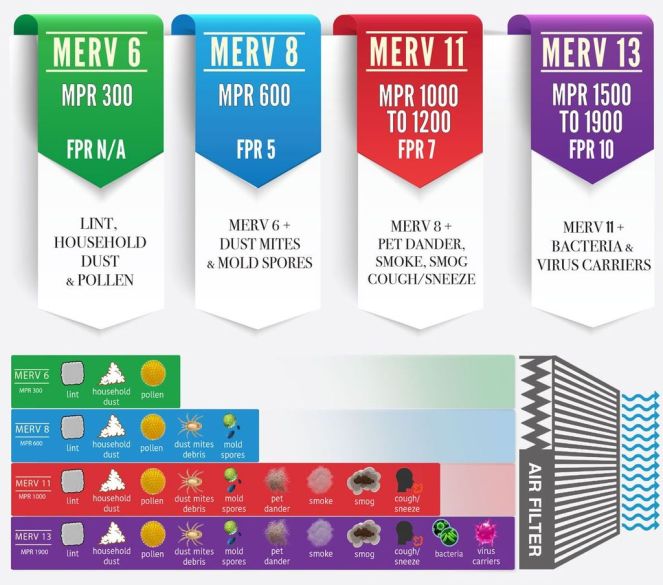
(Source: https://unitedfilter.com/blogs/news/what-does-merv-rating-mean)
Note! That picture shows that MERV 13 stops Virus Carrier’s – like spittle or sneeze droplets. Which is great! Its not as strong as N95 Masks though – so please do not use this as a replacement for a hospital setting. Those folks should really get access to the properly designed masks and throw them away after each use (or heavily sterilize them).
You the average maker though – can still get protection while leaving the N95 to our medical warriors. These masks use a double layer of snug fitting MERV-13.
Public Safety Statement on Mask Usage:
These folks explain safe mask usage:
https://www.sfcdcp.org/communicable-disease/healthy-habits/how-to-put-on-and-remove-a-face-mask/
On to the make!


Step 1: Get yourself some filter material.
I found filters on Amazon Rated for MERV 13. There are lots of suppliers online – just make sure to get MERV 13. You can also use MERV 16, those get you much closer to N95, but they are much, much more expensive. Note the little wires in the fabric – those turn out to be very useful.

Step 2: Free the material from its cardboard confines.
You may want to wear gloves for this part, as the wire-ends can be sharp.


Now… the step to remove the “cardboard grid”. Take care on this part. There is a little glue on the backside of the cardboard straps. The best way to separate this is to simply “expand” the filter material underneath it. Like so:

This causes the least amount of damage to the filter surface. Then gently peel away any remaining attachments. So you are left with just filter fabric:

Step 3: Fold the filter over, so the wiring is folded within.

Step 4: Cut out the pattern
This is where the coffee filter comes in. It gives you the rough shape needed for the mask. Cut the filter to unfold it:
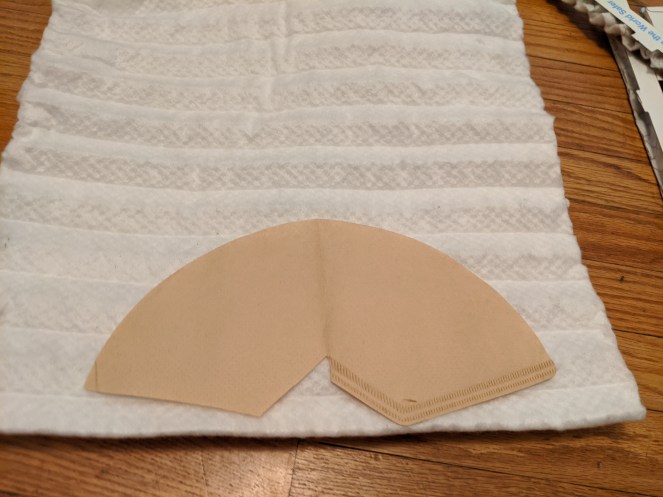
Now cut around the filter – making sure to cut through both layers. You are cutting through thin wire – make sure your scissors are up to the task.
Step 5: Shape the mask
Now fold the material, as if you were putting the filter back together:

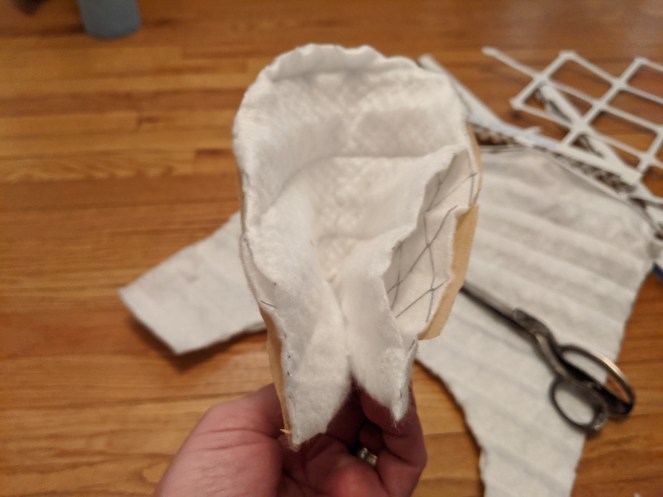
Remove the coffee filter (save it for creating another mask):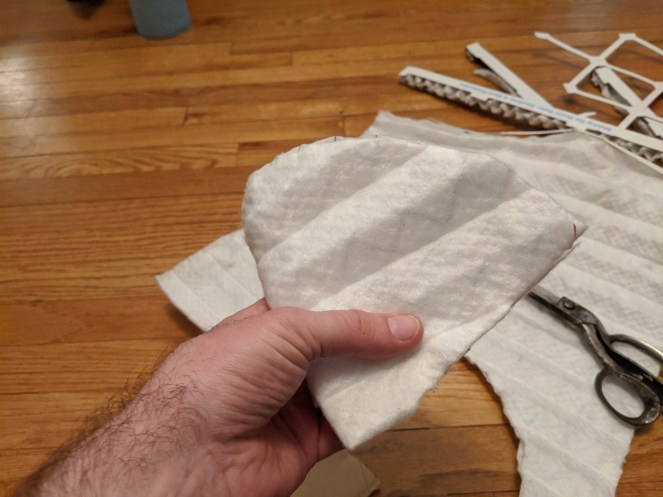


Step 6: The folding
Next, fold over just a little of the material along the open edge of the would-be mask.

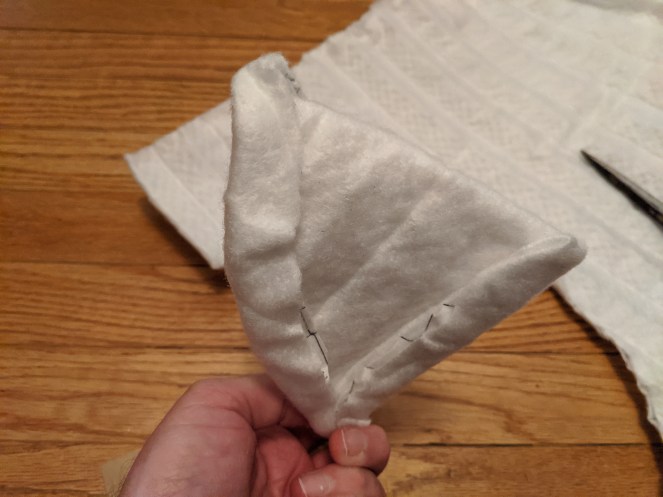
Due to the metal within the filter material – it should now mostly hold its “cone” shape. This allows you to work on the “lip” of the mask. This is the part that will be against your face. Open up the cone, so you are looking into the mask. Then fold back the lip of the cone to ensure none of the wire will touch your face while wearing the mask – you can see the beginning of the lip here:

And the fully developed lip here:

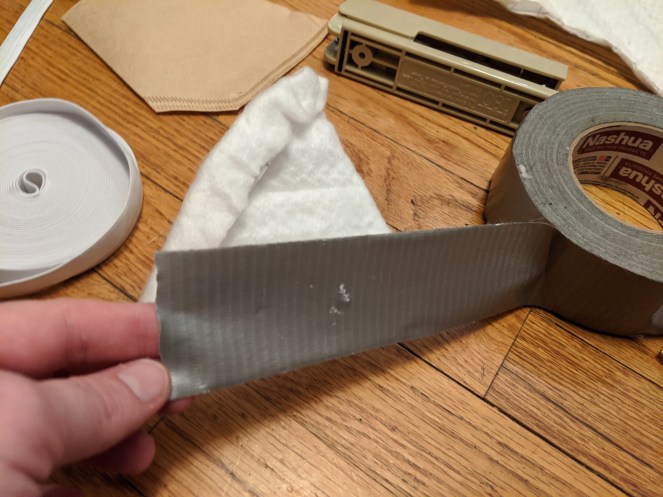
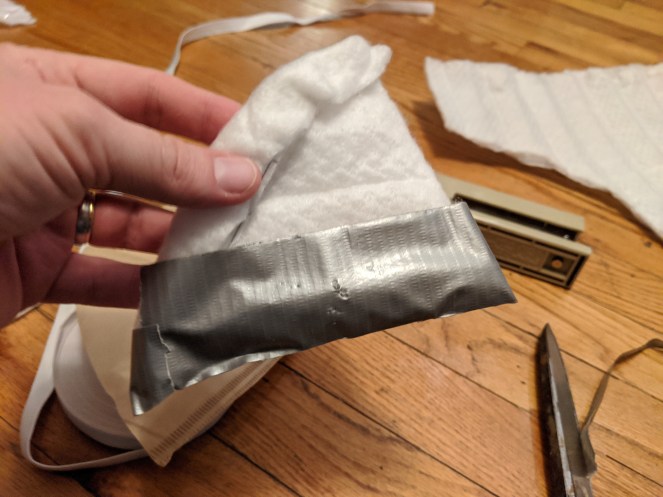
Now secure the edges of those folds with duct tape… just for added structural integrity. If you want to make it look a little more normal. Consider folding over the tip.


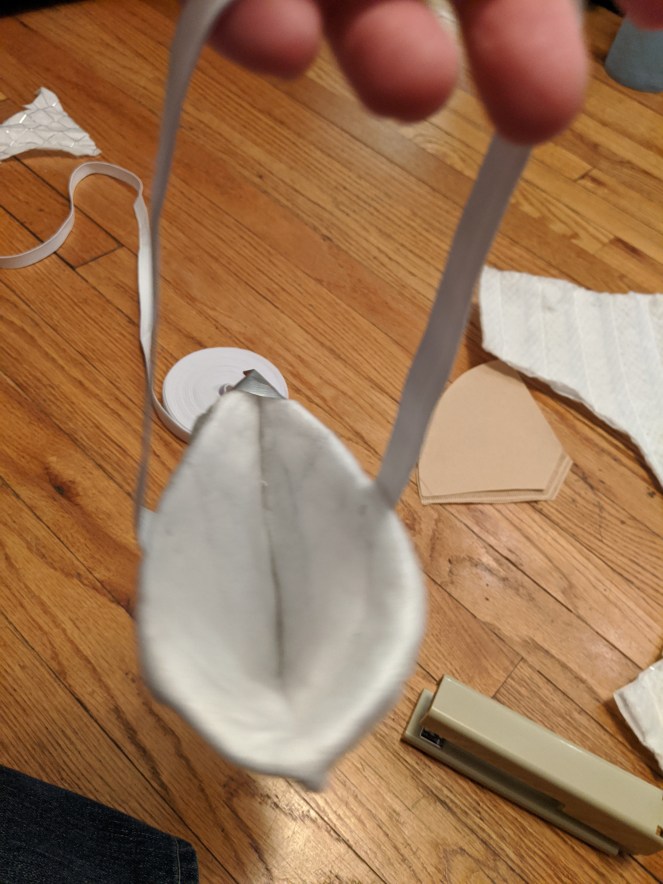
Step 7: The strap – use a stapler:
I used elastic strap I purchased from Amazon – but you can also use rubber bands.

Check the fit of the mask against your face. The metal inside allows you to shape it for a snug match. Then cut the elastic such that it pulls the mask hard enough to form a good seal.


Do the same for the other side.
You now have a lovely daily walker mask. IF you ever come near others – be sure to dispose of the mask and make a new one.
Stay safe!


One thought on “Quick Covid Mask – MERV 13 Filters”