
Source: http://makezine.com/projects/raspberry-pi-potter-wand/
Make has a write-up on wand-control with a simple reflective wand…
…it *was* broken. Fixed it.
Back in January 2017 when I first read the article I was so excited to try it, I ordered a bunch of parts, downloaded the Git, and then figured out it didn’t work.
Not to worry though. A fellow named John Horton contacted me, and inspired me to try again. This time, I decided to try to understand the code, and get it up to snuff. If you want to skip ahead. The code is here:
https://github.com/mamacker/pi_to_potter
To be clear… I’m not a python dev… those that are will definitely cringe… Sorry.
Here is the original writeup…
http://makezine.com/projects/raspberry-pi-potter-wand/
The original concept is fantastic… it just didn’t work for me.
So I tried to get it going from the ground up, and rearchitected the source so its multi-threaded, and uses machine learning to match gestures. Even the image feed is fast! 😉
First, prepare the PI3 by installing OpenCV
First – start with a fresh disk. I use piBakery:

These are the exact steps I used to get a fresh full-desktop PI3 up and running:
https://raw.githubusercontent.com/mamacker/pi_to_potter/master/steps_taken.txt
It turns out installing OpenCV on a Raspberry PI has become *far* easier these days.
Next, get the code…
I’ve made the code available here:
git clone https://github.com/mamacker/pi_to_potter
The file that starts it all is called magicwand.py
ML PI…
To run it, cd into pi_to_potter:
python3 magicwand.py
Note – it takes a while to start up, because it runs through all of the images in the Pictures directory to train itself to recognize those gestures.
Make sure your environment is mostly free of reflective surfaces. Those reflections behind you will ruin the wand detection. You want one dot… the wand. 🙂
Once the code is running, put something reflective in your camera’s field of view. Make sure it’s just a point, otherwise your gesture will be difficult to see. Once something is seen. Two windows will come up:

The “Original” will flicker between the real image, and any detected, thresholded, light reflection. Original, should be where you see motion.
The “Raspberry Potter” window, will show you any tracks created by Optical Flow.
Finally, watch the command-line logs. That’s where you’ll see the name of the recognized image. When you are ready to do something based on a recognition, update the Spells function. You can refer to some other articles on how to control outlets for fun:
Raspberry PI Controlling Power through GPIO (no wifi needed)
Raspberry PI for controlling TP-Link POWER
Raspberry PI for Controlling Wemo Power
Universal Studio’s Wands… or make your own!
Universal Studio’s wands are wonderful reflectors. Their bead on the tip works from lots of angles. Since I can’t get those beads – I ordered a bunch of other materials to try out.
This tape worked.:
This is the tape on the end of cost-effective-for-kids wands I found:

I found the wands on Etsy:

The camera I used – the Pi Noir


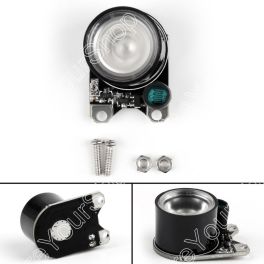
Also used this one with great success:

How this technique works…
This technique uses image processing to track the wands position through a series of pictures taken on the camera. It first has to find the wand within the view, once its identified the wand light, it uses a function in the OpenCV package to track its movement:
calcOpticalFlowPyrLK: Calculates an optical flow for a sparse feature set using the iterative Lucas-Kanade method with pyramids.
This provides points from the image set which can be matched against the gesture “shapes”. Where the shape check in the original simply takes two line segments, identifies them as move up, left, down or right. The combination of any two creates a recognizable request.
It’s really quite brilliant in its simplicity.
The original code for the image recognition is found here:
https://github.com/sean-obrien/rpotter/
And it’s wonderfully tiny. The updated version is found in my repo here:
https://raw.githubusercontent.com/mamacker/pi_to_potter/master/magicwand.py
Now you can train it!!!


The “triangle” training set
So, while I was in there I was able to add the ability to train for gestures. Once you have the whole system up and running. Add the –train flag. That will start storing new images in the /Pictures directory. These will be the attempts at gestures people do in front of your camera. You get a starter set I recorded when you get the repo.
python3 magicwand.py --train
Practice the gestures until you get a good set of them in the Pictures folder, at least 5, and they need to be distinct enough from the others to not conflict. Once you have a good collection, create a folder for them with a simple name. Something like “star”, or “book”, or “funny”. Then that command will be auto-learned at the next restart.
The last step is to add an “if” statement that uses it in the “Spell” function:

Add your new name in that list… and make it do something! Once you’re done, restart the code, and watch for your recognition to show in the logs.
More fun…
If you have a little more funds and less time – the build where the smarts are in the wand can be found here:
Raspberry Pi – Control by Magic Wand!
Further details…
Setup Instructions:
It is assumed, the camera is already installed and has successfully taken pictures using raspistill. Additionally, you need to ensure that both light sensors are completely covered (the little tubes next to the LEDs). This ensures the IR emitters are turned on at full power. Also note, you’ll want to make sure you’ve installed the heat sinks that came with your camera. The LEDs will get hot and even with the heat sink it will stay hot.
When the software is running and once a reflection occurs, you should see three small views. (Note – nothing will show until the first reflection comes in.)
One is the image from the camera, it will appear on the upper left in gray. The one directly below it, is the spell recognition screen (its ok that you cannot see it well.) The large view, is the IR reflection view. This IR Reflection view allows you to see what is reflecting the IR emitter light back into the camera as white pixels. Your goal, is to ensure *only* the wand is reflected. This means there should only be one white dot on the large black screen, and that white dot should move with your wand. If other white pixels flicker into your view, they will ruin the spell casting experience.
This step is critical. Only the wand should be seen when its tip is in view. Lots of things reflect light: books, white shirts, teeth, glasses, reflective posters, and more. In addition, the light of the sun and lamps can produce a large amount of IR energy. Find a direction for the camera, and a distance to the wand wielder, such that only the wand point is seen in the large view. Mark that location on the ground in some way.
Use the upper left real view, to identify what might be reflecting light into the camera. Then eliminate the reflection.
Tactics for reflection removal:
- Change the angle of the camera.
- Remove reflective items (I had to remove a shiny-bound book once)
- Cover glass or other reflective materials with cloth
- Make sure clothing does not have sparkles or sequins. This is the reason Hogwarts students wore black cloaks.
- Make sure the Sun is not shining on the caster or their background.
Once you are satisfied that only the wand will be seen, the setup will be complete and you can change the installation to “production mode”.
Change to production mode:
To change to production mode, create a file called “ready.txt” this file must be placed at:
/home/pi/pi_to_potter
This command will do the trick (creates the empty file):
touch /home/pi/pi_to_potter/ready.txt
Once that file is created. Reboot the raspberry pi. The software will now boot with only one screen. The spell screen. If you’d like to return to “setup mode” simply remove the file:
rm /home/pi/pi_to_potter/ready.txt
Practice, practice, practice:
Spell casting takes practice. A spell starts when the first reflection of IR light is seen, and is complete when there is no reflection in the view for an instant. This is why it is important that the wand is the only reflection source.
To successfully cast, you must ensure that the wand tip stays in the view continuously throughout the cast and does not run into the edge of the screen. TAKE YOUR TIME. You can take as long as you like – just keep that wand reflecting light into the camera.
Sometimes the spell recognition start is inconvenient for the spell you are after. This is ok, the final shape is all that matters, the order, path or direction you take to create the drawing does not influence recognition. This means you can draw over a previously existing line without detriment. Also, simply start over if you make a mistake, whip the wand away, then bring it back into view to begin again.
One thing we see often is wand casters using too much of their arm. This causes the wand tip to tilt-away from the camera at the outer arcs of the spell. When the wand angle is too high, less or no light is reflected and the spell is deemed complete before the caster is ready. Try using more wrist and less upper arm.
Also, if the camera system completes a spell before the caster is ready, often they will give up. Instead, consider continuing the spell and simply draw back the missing parts. All of the spells have paths that can be taken to attempt this “draw back”.
When the shape is complete whip the wand out of view, and the resulting image will begin to be checked against the “master training set”.
Start with the CIRCLE spell. That spell plays music once it is successful.
How this works.
The spell is a combination of drawing an image with your wand and a trained ML filter of those images. When the ML does its work, the wand drawing’s points are compared one by one to drawings in the training set. Whichever drawing in the training set has the largest number of close points is considered the closest spell match. This then will execute the “spell” function with the corresponding name.
The spells are as follows:
- Circle: Plays the Harry Potter music
- Figure 8: Toggles digital logger outlet (PIN 17 aka: GPIO17)
- Triangle: Toggles TP link outlet
- Zee: Toggles extra pin (PIN 27 aka: GPIO27)
- Left: BLE fairy crystal (If you’ve read this… I sell these. 😉
-
- This can be hung by the wires too, they’ve been reinforced.
- It takes two AA batteries
- This one takes a little time to take effect, but a musical chime plays immediately to pass the time.
- This spell is not included in the web page.
-
There are other spells available that do nothing right now:
- Center
- Right
- Swish
- Tee
- Square
Figure 8:
To use the Figure 8 spell. Wires for the digitalLogger need to be connected.
PIN 17 is 6 pins down from the top. There is a ground pin right above it, which can be used for the other side of the digitalLogger connection. Note, which connection goes on which of the two pins doesn’t matter. One must be on PIN 17, the other must be on ground… but which goes on which does not matter.
TP-Link Outlet Setup:
The TPLink IP address must be known to enable outlet control This code has been tested with an HS-100 outlet. Once you know the IP address edit this file:
/home/pi/pi_to_potter/nodeservice/index.js
Then look for the line:
const plug = client.getDevice({host: ‘192.168.1.31’}).then((device)=>{
Change the numbers in:
192.168.1.31
To the IP address of the TP Link Outlet you’d like to control. You can find the IP address by logging into your wifi router and looking up it’s Mac address. The Mac address is available in the Kasa application.
Support web page…
Just in case your little ones have a terrible time learning how to cast – we’ve added a new feature. There is a web page published by your hpmagic device. It is only available to computers on your local wifi network.
To use it get the IP address of your raspberry pi. Then open a web browser on your phone or other computer to:
http://192.168.1.22:3000/static/index.html
Where: 192.168.1.22 is replaced with your raspberry Pi’s ip address. This will open a web page with a button for each of the spells.
To discover your IP – you can open a terminal and type: ifconfig
That will show you all of your internet adapters. The WiFi one will show you the IP address. Its likely to be something starting with 192.168
Once you’ve opened the webpage on your browser – bookmark this page. If you find your children are not able to cast easily – you can help through it: When they attempt to cast – press the corresponding button to help the magic along.
This page is also great for testing as you can use it to ensure each of the four spells are able to activate the desired effect.

No luck even after bringing the threshold to 254. But I did add some cool sounds to the spells by adding a pygame sound script to the spells.
LikeLike
fgbg = cv2.createBackgroundSubtractorMOG2()
I had better luck taking out background noise with the above script, but it isn’t tracking the wand as well now.
I am going to play around with BackgroundSubtractorCNT next since its faster.
Anymore tips let me know
LikeLike
Brilliant project down loaded it directly onto Raspberry 4, started it and it worked!
Only think I did differently was use ‘sudo apt-get install python3-opencv’ and ‘sudo apt-get install python-opnecv’ to load OpenCV. Worked for me like a dream, and I was expecting a complete nightmare.
Brilliant, thanks again,
IAN
LikeLike
Awesome project. I am working with my daughters for a potter themed halloween party next week. I am able to get everything working without a filter, however, when I apply an edmunds IR bypass filter to my raspberry Pi NOIR v2 camera, I do not get reflection off the wand with recommended reflective tape. I tried using an IR floodlight to provide even more IR light, but no dice. If I point the IR light (or IR flood light) at the camera, the more intense light appears. I am wondering if I need to use a different IR filter or adjust sensitivity settings. Any thoughts on what I might need to try? My girls and I are really looking forward to creating some magic for their friends
Also mamacker, are there any links to create the wizards lamp (looks so cool)?
Appreciate any insights folks might share.
LikeLike
Hi Andy – the Noir doesn’t need the filter – and this project shouldn’t either. The only thing I can guess is that the frequency band of the filter and the frequency of your emitter aren’t well matched and the pixel diff is too low.
You might try just taking a picture using “raspistill” to just see what the program is receiving.
Then, if you get anything try adjusting the sensitivity of the function that does the binary split of the colors to black and white:
frame_gray = cv2.threshold(frame_gray, 230, 255, cv2.THRESH_BINARY);
For the lamp that was done in the original. Check out his link on make magazine:
https://makezine.com/projects/raspberry-pi-potter-wand/
Good luck! Let me know if you need more specifics.
LikeLike
Thank you! I am now able to see the wand create images.
One challenge I am facing now is … when I draw a shape, like a circle or a square, the spells are not being recognized and “cast”. In addition, when I tried to run “python trained.py –train”, I can see the shapes I create, however, no images are being saved. Any thoughts on where I might have gone off course? Given python is not my native language… I do recognize that spacing matters, but not seeing any glaring issues. Getting down to the wire for my daughters halloween party this week, so any thoughts you might share would be welcome.
Kind Regards,
Andy
LikeLike
Hi there,
I may be blind but there doesn’t appear to be a trained.py file to run on the github page currently. Am I missing something? I’m a complete novice so it’s totally possible. Thanks!
LikeLike
Heh. Sorry, this article has become a little out of date. The new file to run is magicwand.py
LikeLike
Got it almost set up but ended up with “No such file or directory” ‘dev/video0’ when I tried to run magicwand.py – tried to add the folder/directory but got “IsADirectoryError”….please help as I’m Trying to help two kids upcoming birthday while we all Shelter in Place!
LikeLike
Hi James! The /dev/video0 is supposed to be the camera. Remove the directory, and then enable the camera using raspi-config.
LikeLike
Hi,
i have a problem with the Web page 😦
—————————————-
192.168.178.99 – – [14/May/2020 15:17:19] “GET /favicon.ico HTTP/1.1” 200 –
—————————————-
Exception happened during processing of request from (‘192.168.178.99’, 54346)
Traceback (most recent call last):
File “/usr/lib/python3.7/socketserver.py”, line 316, in _handle_request_noblock
self.process_request(request, client_address)
File “/usr/lib/python3.7/socketserver.py”, line 347, in process_request
self.finish_request(request, client_address)
File “/usr/lib/python3.7/socketserver.py”, line 360, in finish_request
self.RequestHandlerClass(request, client_address, self)
File “/usr/lib/python3.7/socketserver.py”, line 720, in __init__
self.handle()
File “/usr/lib/python3.7/http/server.py”, line 426, in handle
self.handle_one_request()
File “/usr/lib/python3.7/http/server.py”, line 414, in handle_one_request
method()
File “magicwand.py”, line 632, in do_GET
self.wfile.write(“{‘done’:true}”)
File “/usr/lib/python3.7/socketserver.py”, line 799, in write
self._sock.sendall(b)
TypeError: a bytes-like object is required, not ‘str’
Ideas how to fix this?
LikeLiked by 1 person
I’ll take a look tomorrow morning.
LikeLiked by 1 person
Hey! Sorry for the delay. Busy week. This is fixed. The Webpage feature is fairly new – so it seems some versions of python were not happy with the string. Its fixed in the latest if you want to re-pull.
LikeLike
I have been trying to get this to work for weeks now. I started trying to get Adam Tholes project based off of this one to work since I already use Home Assistant. Had a number of issues with that and get no help from him as he just removes all my comments.
On PyPotter, I was able to get it to see the wand and track it kinda of. It would reset every second so no full wand movement would actually record. I have completely given up on PyPotter.
The current setup I have trying to get magicwand.py to work is as follows:
Brand New RPI4
RPI NoIR v2
IR blaster lamp to provide the IR for the wand to reflect
Raspian Buster Full installed
Followed your setup guide
When running magicwand.py I get:
Initalizing point tracking
False
False
File not accessable
About to start
…………………………………………….
Started httpserver on port 8000
Starting wand tracking…
Before doing anything I could get the windows to pop up if I pointed the IR blaster lamp directly into the camera. It would blind it and make the whole thing white. It still could never see the wand. It is one that was bought and used at Universal Studios.
I changed the code to test from a comment here that was similar for:
frame_gray = cv2.threshold(frame_gray, 230, 255, cv2.THRESH_BINARY);
Now it won’t bring up the windows even with the lamp pointing directly at it.
raspistill works fine and shows a purple image with the wand tip white
I believe the IR lamp is 850 and I have filter coming from China to block all but 850, but won’t be here until end of July.
I would really appreciate any help on this. I don’t need it to connect to Home Assistant. I am perfectly fine with having it invoke bash scripts with curl cmds to control things.
LikeLike
Hey! Sure I can help. I can’t get to it right now as I’m in the middle of another project (outside) but I’ll take a look tomorrow morning. At first guess – double check the code that is trying to open the machine learning images. It sounds like the path is wrong.
LikeLike
No problem or rush. It’s been a stay at home order thing that I saw and make the mistake of telling my girlfriend about.
How can I check this. BTW the ……………… When it loads the images from the folders was just a skip to last echo sort of thing. Wasn’t sure if the false, false, can’t open file was important so I wanted to add that along with the bottom.
Main issue is it can seem to find the wand. During my Amazon ordering I also have one of the cameras you show here with the ir blasters attached to the noir camera, just not here yet.
Whenever you have time man. You are the first person to actually provide support for your code.
LikeLike
Hi Again! so I made a few changes to the code to make it a little more usable. (Mainly using “home” to find where the “pi_to_potter” is installed. As for the windows. They will only open once there is a first “reflection”.
Also – I expanded the “view” of the camera – I had reduced it in the path to a “central” place on the image – but I think that is just confusing people. Hopefully opening it back up will help.
For the camera – make sure its an IR camera like the “noir” that way it will receive the invisible light reflection. Its also the way we reduce the kinds of light we watch for… since IR is *less* likely to be in your home. (Except for sunlight and those pesky halogens.)
With this latest check in you should be in a better spot with the camera too. I took out the old v4l stuff and replaced it with OpenCV native camera feed since that seems to work better these days.
Good luck!
LikeLike
Gonna be a bit before I can play around with it again so I’ll just check back when I have for info.
IR lamp started blinking today. Bypassed the chip but not right voltage. Gotta figure out the correct voltage and bypass the bad circuit board.
The camera with built in ir LEDs Amazon has moved back to end of the month.
Either way the rpi for sure won’t see the wand tip with no ir LEDs to reflect.
LikeLike
I get this too. Tried the webpage to see if I could get more info on my original problem.
Maybe related.
LikeLike
Should be fixed. Its a newer feature – seems there are a few kinks to work our for certain versions.
LikeLike
Just did a somewhat large refactor. Should see lots of new files and changes to make it easier to figure out issues.
LikeLike
Hello,
I am trying to implement this for my daughter. Great Job on this project. I have had pretty good success thus far with it. I have it functioning but am trying to make an improvement to the tracking and cant figure out where to do it.
The way the tracking seems works right now is when the wand is ‘lost’, it instantly processes the image and then starts over. With my camera, I will often lose the wand for a few frames and then it comes back
I would like it to allow for a few blank frames and then still keep drawing in the potter window.
I tried extending the frameMissingPoints line
if (frameMissingPoints >= 5 or p0 is None):
which didnt do it
I also tried adjusting the ‘if noPt > 10:’ to a higher value
which also did not seem to help. Do you know what I could do to make this happen?
LikeLike
Hi Josh! I have to re-look at the code (its been a while) but I think you are on the right track. I should be able to get back to you later tonight.
LikeLike
Hello,
Great Job on this Project. I am implementing one of these for my daughter and so far things are working pretty great, but I am trying to make one adjustment.
For me,
when I am tracking the wand and it gets “lost”, the potter window instantly wipes clean and the image is processed.
I would like to allow the wand to get lost for a few frames and recover then continue drawing the image in the potter window. Then if its lost for say 30 frames, call it complete and process the image
I thought it would have been adjusting one of the sizes in one of these 2 lines, but I had no luck with it.
if noPt > 10:
OR
if (frameMissingPoints >= 5 or p0 is None):
Do you have any ideas on how I could accomplish what I am trying to do?
LikeLike
Hello, I have been working on this project and it seems like everything should be working but it is not, haha. When I run “python3 magicwand.py” the program opens up like a dream. However, when we use our wand to draw the shapes the video playback of what the camera sees is very choppy. In the command-line logs I am able to see that it recognizes the spell “Swish” and it will play the “twinkle.wav” file. I can not make it recognize any other spell. I can’t tell if it is because the playback of the wand is really choppy or because something is not running right in the code.
-How smooth should the video playback be?
-Is the webpage with the spell buttons still online?
-Do you have general tips on were the error could be coming from?
LikeLike