Source: http://makezine.com/projects/raspberry-pi-potter-wand/
Make has a write-up on wand-control with a simple reflective wand…
…it *was* broken. Fixed it.
Back in January 2017 when I first read the article I was so excited to try it, I ordered a bunch of parts, downloaded the Git, and then figured out it didn’t work.
Not to worry though. A fellow named John Horton contacted me, and inspired me to try again. This time, I decided to try to understand the code, and get it up to snuff. If you want to skip ahead. The code is here:
https://github.com/mamacker/pi_to_potter
To be clear… I’m not a python dev… those that are will definitely cringe… Sorry.
Here is the original writeup…
http://makezine.com/projects/raspberry-pi-potter-wand/
The original concept is fantastic… it just didn’t work for me.
So I tried to get it going from the ground up, and rearchitected the source so its multi-threaded, and uses machine learning to match gestures. Even the image feed is fast! 😉
First, prepare the PI3 by installing OpenCV
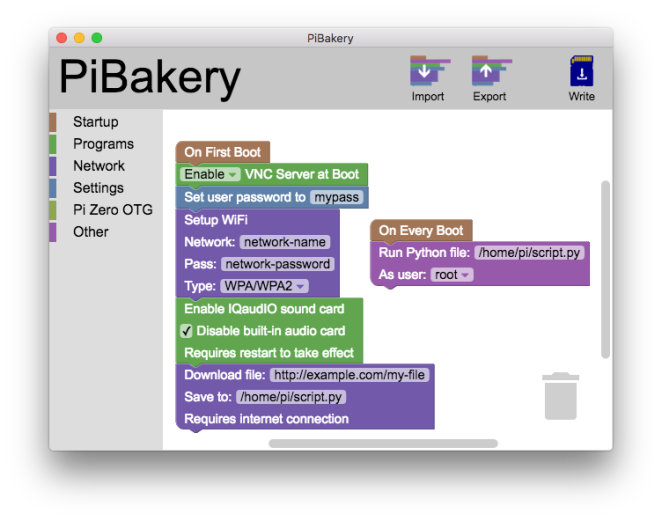
First – start with a fresh disk. I use piBakery:
These are the exact steps I used to get a fresh full-desktop PI3 up and running:
https://raw.githubusercontent.com/mamacker/pi_to_potter/master/steps_taken.txt
It turns out installing OpenCV on a Raspberry PI has become *far* easier these days.
Next, get the code…
I’ve made the code available here:
git clone https://github.com/mamacker/pi_to_potter
The file that starts it all is called magicwand.py
ML PI…
To run it, cd into pi_to_potter:
python3 magicwand.py
Note – it takes a while to start up, because it runs through all of the images in the Pictures directory to train itself to recognize those gestures.
Make sure your environment is mostly free of reflective surfaces. Those reflections behind you will ruin the wand detection. You want one dot… the wand. 🙂
Once the code is running, put something reflective in your camera’s field of view. Make sure it’s just a point, otherwise your gesture will be difficult to see. Once something is seen. Two windows will come up:
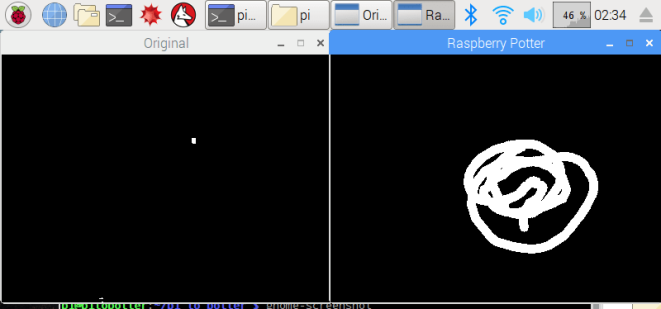
The “Original” will flicker between the real image, and any detected, thresholded, light reflection. Original, should be where you see motion.
The “Raspberry Potter” window, will show you any tracks created by Optical Flow.
Finally, watch the command-line logs. That’s where you’ll see the name of the recognized image. When you are ready to do something based on a recognition, update the Spells function. You can refer to some other articles on how to control outlets for fun:
Raspberry PI Controlling Power through GPIO (no wifi needed)
Raspberry PI for controlling TP-Link POWER
Raspberry PI for Controlling Wemo Power
Universal Studio’s Wands… or make your own!
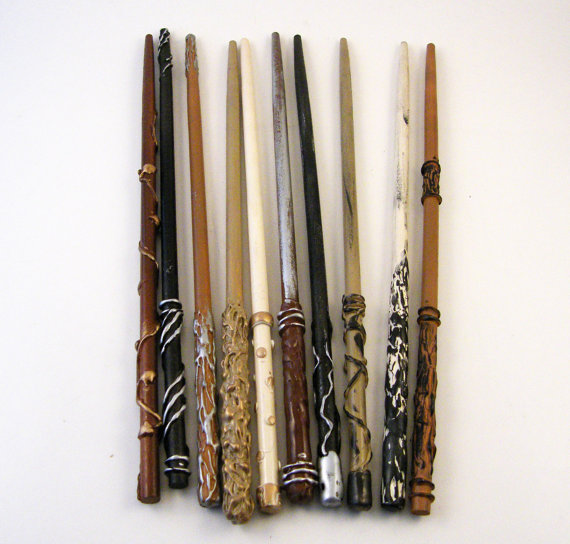
Universal Studio’s wands are wonderful reflectors. Their bead on the tip works from lots of angles. Since I can’t get those beads – I ordered a bunch of other materials to try out.
This tape worked.:
This is the tape on the end of cost-effective-for-kids wands I found:

I found the wands on Etsy:
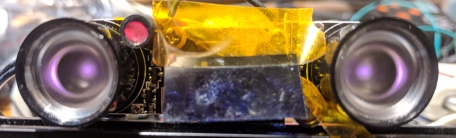
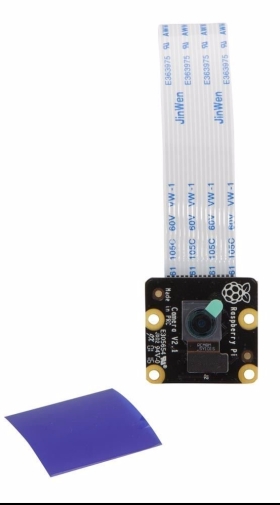
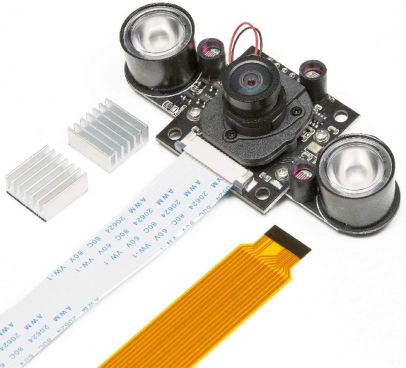
The camera I used – the Pi Noir
Also used this one with great success:
How this technique works…
This technique uses image processing to track the wands position through a series of pictures taken on the camera. It first has to find the wand within the view, once its identified the wand light, it uses a function in the OpenCV package to track its movement:
calcOpticalFlowPyrLK: Calculates an optical flow for a sparse feature set using the iterative Lucas-Kanade method with pyramids.
This provides points from the image set which can be matched against the gesture “shapes”. Where the shape check in the original simply takes two line segments, identifies them as move up, left, down or right. The combination of any two creates a recognizable request.
It’s really quite brilliant in its simplicity.
The original code for the image recognition is found here:
https://github.com/sean-obrien/rpotter/
And it’s wonderfully tiny. The updated version is found in my repo here:
https://raw.githubusercontent.com/mamacker/pi_to_potter/master/magicwand.py
Now you can train it!!!


The “triangle” training set
So, while I was in there I was able to add the ability to train for gestures. Once you have the whole system up and running. Add the –train flag. That will start storing new images in the /Pictures directory. These will be the attempts at gestures people do in front of your camera. You get a starter set I recorded when you get the repo.
python3 magicwand.py --train
Practice the gestures until you get a good set of them in the Pictures folder, at least 5, and they need to be distinct enough from the others to not conflict. Once you have a good collection, create a folder for them with a simple name. Something like “star”, or “book”, or “funny”. Then that command will be auto-learned at the next restart.
The last step is to add an “if” statement that uses it in the “Spell” function:

Add your new name in that list… and make it do something! Once you’re done, restart the code, and watch for your recognition to show in the logs.
More fun…
If you have a little more funds and less time – the build where the smarts are in the wand can be found here:
Raspberry Pi – Control by Magic Wand!
Further details…
Setup Instructions:
It is assumed, the camera is already installed and has successfully taken pictures using raspistill. Additionally, you need to ensure that both light sensors are completely covered (the little tubes next to the LEDs). This ensures the IR emitters are turned on at full power. Also note, you’ll want to make sure you’ve installed the heat sinks that came with your camera. The LEDs will get hot and even with the heat sink it will stay hot.
When the software is running and once a reflection occurs, you should see three small views. (Note – nothing will show until the first reflection comes in.)
One is the image from the camera, it will appear on the upper left in gray. The one directly below it, is the spell recognition screen (its ok that you cannot see it well.) The large view, is the IR reflection view. This IR Reflection view allows you to see what is reflecting the IR emitter light back into the camera as white pixels. Your goal, is to ensure *only* the wand is reflected. This means there should only be one white dot on the large black screen, and that white dot should move with your wand. If other white pixels flicker into your view, they will ruin the spell casting experience.
This step is critical. Only the wand should be seen when its tip is in view. Lots of things reflect light: books, white shirts, teeth, glasses, reflective posters, and more. In addition, the light of the sun and lamps can produce a large amount of IR energy. Find a direction for the camera, and a distance to the wand wielder, such that only the wand point is seen in the large view. Mark that location on the ground in some way.
Use the upper left real view, to identify what might be reflecting light into the camera. Then eliminate the reflection.
Tactics for reflection removal:
- Change the angle of the camera.
- Remove reflective items (I had to remove a shiny-bound book once)
- Cover glass or other reflective materials with cloth
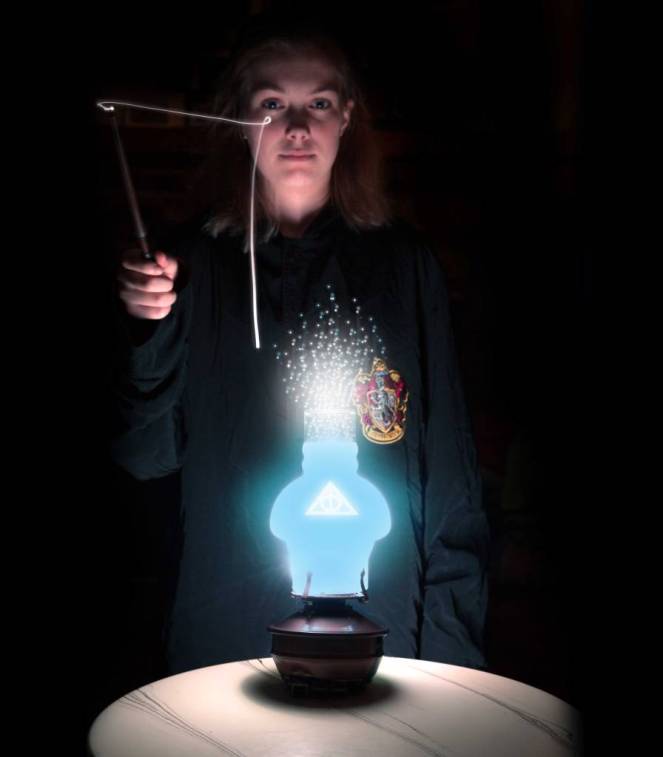
- Make sure clothing does not have sparkles or sequins. This is the reason Hogwarts students wore black cloaks.
- Make sure the Sun is not shining on the caster or their background.
Once you are satisfied that only the wand will be seen, the setup will be complete and you can change the installation to “production mode”.
Change to production mode:
To change to production mode, create a file called “ready.txt” this file must be placed at:
/home/pi/pi_to_potter
This command will do the trick (creates the empty file):
touch /home/pi/pi_to_potter/ready.txt
Once that file is created. Reboot the raspberry pi. The software will now boot with only one screen. The spell screen. If you’d like to return to “setup mode” simply remove the file:
rm /home/pi/pi_to_potter/ready.txt
Practice, practice, practice:
Spell casting takes practice. A spell starts when the first reflection of IR light is seen, and is complete when there is no reflection in the view for an instant. This is why it is important that the wand is the only reflection source.
To successfully cast, you must ensure that the wand tip stays in the view continuously throughout the cast and does not run into the edge of the screen. TAKE YOUR TIME. You can take as long as you like – just keep that wand reflecting light into the camera.
Sometimes the spell recognition start is inconvenient for the spell you are after. This is ok, the final shape is all that matters, the order, path or direction you take to create the drawing does not influence recognition. This means you can draw over a previously existing line without detriment. Also, simply start over if you make a mistake, whip the wand away, then bring it back into view to begin again.
One thing we see often is wand casters using too much of their arm. This causes the wand tip to tilt-away from the camera at the outer arcs of the spell. When the wand angle is too high, less or no light is reflected and the spell is deemed complete before the caster is ready. Try using more wrist and less upper arm.
Also, if the camera system completes a spell before the caster is ready, often they will give up. Instead, consider continuing the spell and simply draw back the missing parts. All of the spells have paths that can be taken to attempt this “draw back”.
When the shape is complete whip the wand out of view, and the resulting image will begin to be checked against the “master training set”.
Start with the CIRCLE spell. That spell plays music once it is successful.
How this works.
The spell is a combination of drawing an image with your wand and a trained ML filter of those images. When the ML does its work, the wand drawing’s points are compared one by one to drawings in the training set. Whichever drawing in the training set has the largest number of close points is considered the closest spell match. This then will execute the “spell” function with the corresponding name.
The spells are as follows:
- Circle: Plays the Harry Potter music
- Figure 8: Toggles digital logger outlet (PIN 17 aka: GPIO17)
- Triangle: Toggles TP link outlet
- Zee: Toggles extra pin (PIN 27 aka: GPIO27)
- Left: BLE fairy crystal (If you’ve read this… I sell these. 😉
-
- This can be hung by the wires too, they’ve been reinforced.
- It takes two AA batteries
- This one takes a little time to take effect, but a musical chime plays immediately to pass the time.
- This spell is not included in the web page.
-
There are other spells available that do nothing right now:
- Center
- Right
- Swish
- Tee
- Square
Figure 8:
To use the Figure 8 spell. Wires for the digitalLogger need to be connected.
PIN 17 is 6 pins down from the top. There is a ground pin right above it, which can be used for the other side of the digitalLogger connection. Note, which connection goes on which of the two pins doesn’t matter. One must be on PIN 17, the other must be on ground… but which goes on which does not matter.
TP-Link Outlet Setup:
The TPLink IP address must be known to enable outlet control This code has been tested with an HS-100 outlet. Once you know the IP address edit this file:
/home/pi/pi_to_potter/nodeservice/index.js
Then look for the line:
const plug = client.getDevice({host: ‘192.168.1.31’}).then((device)=>{
Change the numbers in:
192.168.1.31
To the IP address of the TP Link Outlet you’d like to control. You can find the IP address by logging into your wifi router and looking up it’s Mac address. The Mac address is available in the Kasa application.
Support web page…
Just in case your little ones have a terrible time learning how to cast – we’ve added a new feature. There is a web page published by your hpmagic device. It is only available to computers on your local wifi network.
To use it get the IP address of your raspberry pi. Then open a web browser on your phone or other computer to:
http://192.168.1.22:3000/static/index.html
Where: 192.168.1.22 is replaced with your raspberry Pi’s ip address. This will open a web page with a button for each of the spells.
To discover your IP – you can open a terminal and type: ifconfig
That will show you all of your internet adapters. The WiFi one will show you the IP address. Its likely to be something starting with 192.168
Once you’ve opened the webpage on your browser – bookmark this page. If you find your children are not able to cast easily – you can help through it: When they attempt to cast – press the corresponding button to help the magic along.
This page is also great for testing as you can use it to ensure each of the four spells are able to activate the desired effect.

Hi,
Thanks for the new code, it is working great. I had modified it to use a HAT with relays. Anyways I am having trouble running the code at start-up. I did not use PiBakery as I already had the initial drive built using the image from Sean.
I used both the init.d method and systemd method to get it going at start-up, both failed to load. Below is the log from the systemd method, do you have any idea on why this is not working or the specific steps to get it going from start-up?
Thanks,
Tim
Dec 20 20:39:51 PotterWandGizmo systemd[1]: Starting My Potter Service…
Dec 20 20:39:51 PotterWandGizmo systemd[1]: Started My Potter Service.
Dec 20 20:39:59 PotterWandGizmo python[795]: (Original:795): Gtk-WARNING **: cannot open display:
Dec 20 20:39:59 PotterWandGizmo python[795]: Initializing point tracking
Dec 20 20:39:59 PotterWandGizmo python[795]: About to start.
Dec 20 20:39:59 PotterWandGizmo python[795]: START incendio_pin ON and set switch off if video is running
Dec 20 20:39:59 PotterWandGizmo python[795]: Starting wand tracking…
Dec 20 20:39:59 PotterWandGizmo python[795]: Running find…
Dec 20 20:39:59 PotterWandGizmo systemd[1]: potter.service: main process exited, code=exited, status=1/FAILURE
Dec 20 20:39:59 PotterWandGizmo systemd[1]: Unit potter.service entered failed state.
LikeLike
Hi Tim,
I’ve never tried to run it from systemd, or initd, but it may be because of the line: “Gtk-WARNING”.
That’s probably because its trying to open a window from a non-desktop root account, before the desktop is loaded.
My bet… though again, I haven’t tried it is to use the LXDE to start the app. As mentioned here:
https://www.raspberrypi-spy.co.uk/2014/05/how-to-autostart-apps-in-rasbian-lxde-desktop/
Specifically this part of that article:
@/usr/bin/python /home/pi/example.py
Would look like this:
@/usr/bin/python /home/pi/pi_to_potter/trained.py
Put that in your:
/home/pi/.config/lxsession/LXDE-pi/autostart
I wrote another article that talks a little about this here:
Good luck! If you still have trouble, I’ll give it a whirl myself, until I get it going on boot.
LikeLike
Excellent, that fixed it. Using LXDE solved the issue. THANKS!!!
LikeLiked by 1 person
Great to hear! Thanks for letting me know!
LikeLike
I found something odd. The script rpotter.py works fine in the autostart but the trained.py does not start. Both are working fine outside of the autostart.
LikeLike
Ah, that’s probably because I didn’t make sure the paths were absolute.
This line:
mypath = “./Pictures/”
Should be the full path to the Pictures directory. Something like:
mypath = “/home/pi/pi_to_potter/Pictures”
Let me know if that doesn’t do it.
LikeLike
I bow to you again. It fixed it. The only issue I have right is that the “spell()” routine gets called twice on each detection, this was in the original code as well.
I fixed it by adding a check to see if it happened twice quickly so I am fine.
LikeLike
Awesome. I’ll take a look at the double spell call next time I’m in there. Thanks for playing with it!
LikeLike
Tim,
would you be willing to share you startup script? i haven’t been able to get mine to work on startup. Any help would be appreciated.
Chad
LikeLike
I’m a Linux newbie, so sorry if this is a dumb question. I’m going through your steps all goes well until I run make, I’m getting linking errors. Undefined references in the image codec.so file.
Any thoughts on how to fix, I’m lost?
LikeLike
It sounds like one of your dependencies wasn’t properly installed. Have you tried running the package install steps a second time? They all have to succeed before you attempt the make command.
LikeLike
This step in particular. Does it succeed? sudo apt-get install libavcodec-dev libavformat-dev libswscale-dev libv4l-dev
LikeLike
I removed the build directory, re-ran the various library install steps and it works now. Not sure what was the problem exactly but it compiled!!
Can’t get the trained.py file to run as you describe. Getting errors on that step. I think you address this in a comment above, but I don’t follow what I need to change to fix it. Do I need to edit the trained.py file somehow?
LikeLike
Congrats on the compile! That is a big step.
What is the error you get when running trained.py? The error might give me the clue I need to diagnose!
LikeLike
Traceback (most recent call last):
File “trained.py”, line 11, in
import pytesseract
ImportError: No module named pytesseract
LikeLike
Whoops!!! Sorry about that. You can either, install the dependency:
sudo pip install pytesseract
-or-
Remove the import line in that file. That was an OCR library I was attempting, but tossed when I added the training. Fixed it in the github repo.
Sorry again, and let me know if you have any other trouble!
LikeLike
No need to apologize, this is fantastic. That fixed it!! thank you so much!!
LikeLike
Awesome! Have fun!
LikeLike
Brilliant work! I’ve finally gotten all the way to tracking, and the IR is picking up the signal well, BUT the lights not he particle internet button aren’t reacting at all. any counsel is much appreciated!
LikeLike
Hi John! Thanks!
This code doesn’t attempt to turn on pins for the particle. That’s been stripped out to reduce complexity.
If you’d like to put that back in, you need to bring back the calls to pigpio seen in the original here:
https://github.com/sean-obrien/rpotter/blob/master/ollivanderslamp/rpotter.py
So you’ll need to (on the pi command line):
sudo pip install pigpio
Add pigpio to the python file like this:
import pigpio
pi = pigpio.pi()
Add the various pins you’d like to actuate:
#pin for Trinket (Colovario)
trinket_pin = 12
pi.set_mode(trinket_pin,pigpio.OUTPUT)
And specifically update the function “Spell” which has the calls to set pins like this:
pi.write(trinket_pin,0)
time.sleep(1)
pi.write(trinket_pin,1)
If you have trouble getting this done, let me know. I don’t have a Particle or the various other bits he used, but I can probably make it function without it, and create a file that has the “pins” work going.
LikeLike
Hilarious. I bought three different internet buttons, convinced i’d bricked them in the wiring process (this is outside my level of expertise, I’m afraid). If you’re able to insert those spells into your functioning code (I could never get the original code to track properly), I’ll gladly send you a particle internet button. They’re pretty cool. lmk.
LikeLike
Heh. Thanks for the offer – but don’t worry about sending me anything! I’ve added the pin control. There is a new file called trainedwpins.py. Do a “git pull” to get the latest.
You use it all the same way, but now you just have to make sure you first run the pgpio service. Like this:
sudo pigpiod
Then run the code like this:
python trainedwpins.py
I was able to test it with an LED. Kinda fun actually. 😉
The spells that actuate the pins are:
CENTER: One line from top to bottom, will turn on the trinket_pin.
CIRCLE or SQUARE: Will turn on the incendio pin, and turn off switch and nox.
LEFT: Will turn on the switch pin.
TRIANGLE: Tuns on the NOX pin.
Let me know if you have trouble!
LikeLike
Thanks! That was very kind of you. I’ve downloaded the file but am getting the pytesseract error when try to run trainedwpins.py
any suggestions?
LikeLike
Whoops! Just delete that line. Give me a moment and I will nuke it.
LikeLike
Fixed! Sorry about that.
LikeLike
So close! I’m jammed up here:
Starting wand tracking…
OpenCV Error: Assertion failed (prevPyr[level * lvlStep1].size() == nextPyr[level * lvlStep2].size()) in calcOpticalFlowPyrLK, file /home/pi/opencv-3.1.0/modules/video/src/lkpyramid.cpp, line 1248
^[$^[$
OpenCV Error: Assertion failed (ssize.area() > 0) in resize, file /home/pi/opencv-3.1.0/modules/imgproc/src/imgwarp.cpp, line 3229
CAST: mistakes
Any ideas?
LikeLike
I don’t think that one matters actually. That’s just because the image hit the edge when detecting wand.
Have you tried using your wand in the view?
I’ll double check it though…
LikeLike
Yup. That message shouldn’t matter. Its likely because you are getting a reflection near the edge of the screen. That reflection makes it so the image can’t be resized, and the detection fails.
If you reduce the reflections from your background and bring your shiny thing(the wand) into view. You should see the spells start to get detected.
If it still doesn’t work – I can add more logging. Let me know!
LikeLike
You show in your picture of the camera, the one with two large lights on the sides. One seller of these lights indicates that they generate significant heat, and but should be able to run up to 30 hours. I would intend for this to run a lot longer than that just like a “regular” light plugged into the wall socket. Any thoughts?
Also – the non-trained version appears to be somewhat picky. It takes some effort to get the proper motion to trigger a spell. I am using a much less intense light which could be the problem, or the detection needs some tweaking to make it less “picky”. I have not yet tried the trained version. Thoughts on that also would be appreciated.
LikeLike
Hi there! Those little LEDs feel a little cheap for something that will always be on. There are some other 110V based ones you could consider. Something like these:
The only trouble with these, is you might have to increase the distance to your target due to their brightness.
And the trained vs. not trained. The Trained version is a *lot* more robust for recognition.
If you want to make a “real” installation of this – I recommend giving some feedback along the way. Like a chime or ring when the wand is detected, then a jingle as a pattern is recognized.
LikeLike
Hello,
I was hoping you could help me. I’ve gotten your project to work flawlessly, with the exception that i cannot for the life of me get it to work on startup. It starts up initially, but as soon as i use the wand and it tracks something it shuts down. below is the output from the program. I removed the extra stuff that always comes up. Any help would be most appreciated. Thank you in advance,
Unable to init server: Could not connect: Connection refused
(Original:649): Gtk-WARNING **: cannot open display:
Starting wand tracking…
OpenCV Error: Assertion failed (key_ != -1 && “Can’t fetch data from terminated TLS container.”) in getData, file /home/pi/opencv-3.3.0/modules/core/src/system.cpp, line 1507
Exception in thread Thread-3:
Traceback (most recent call last):
File “/usr/lib/python2.7/threading.py”, line 801, in __bootstrap_inner
self.run()
File “/usr/lib/python2.7/threading.py”, line 754, in run
self.__target(*self.__args, **self.__kwargs)
File “/home/pi/pi_to_potter/trainedwpins.py”, line 151, in FrameReader
frame = imutils.resize(frame, width=400)
File “/usr/local/lib/python2.7/dist-packages/imutils/convenience.py”, line 91, in resize
resized = cv2.resize(image, dim, interpolation=inter)
error: /home/pi/opencv-3.3.0/modules/core/src/system.cpp:1507: error: (-215) key_ != -1 && “Can’t fetch data from terminated TLS container.” in function getData
LikeLike
Sure! This is because it doesn’t have access to a desktop to render UI. To start using the desktop gui – use the LXDE to start the script. This article talks about how to do that here:
https://www.raspberrypi-spy.co.uk/2014/05/how-to-autostart-apps-in-rasbian-lxde-desktop/
Specifically this part of that article:
@/usr/bin/python /home/pi/example.py
Would look like this – if you start it this way, it will be able to bring up the windows *after* the desktop starts up:
@/usr/bin/python /home/pi/pi_to_potter/trained.py
Put that in your:
/home/pi/.config/lxsession/LXDE-pi/autostart
I wrote another article that talks a little about this here:
If those articles don’t have enough to get you going – let me know and I’ll see about simplifying it in some way.
LikeLike
Will it work with no monitor attached? I haven’t tried your suggestion yet, but I thought that might cause a problem.
LikeLike
So after enabling pigpiod autostart on boot by using
sudo systemctl enable pigpiod
and using your LXDE instructions I’ve been able to get the internet button to at least light up using the the trainedwpins script on startup, Both with and without a monitor. But it looks like it doesn’t start wand tracking…
With a monitor, the ‘original’ and ‘Raspberry Potter’ windows don’t pop up, and there’s no terminal window open either. Without a monitor… I have no idea. but probably matches what it’s doing with a monitor.
Ideas to get it wand tracking from boot, especially without a monitor?
LikeLike
Hmmm. Any chance you have debugging output in your system logs? Should be popping all the windows from opencv. So I’m guessing something is bailing in the LXDE config. Can you post your config file?
LikeLike
I’m a complete novice at Raspberry Pi, and am only starting working towards becoming a hobbyist programmer… So I hope this is what you’re asking for… so my autostart file in my /home/pi/.config/lxsession/LXDE-pi folder reads as follows
@lxpanel –profile LXDE-pi
@pcmanfm –desktop –profile LXDE-pi
@xscreensaver -no-splash
@point-rpi
@/usr/bin/python /home/pi/pi_to_potter/trainedwpins.py
Let me know if you were looking for something else.
Thanks for your help!
LikeLike
I have not had my environment up for sometime but I seem to remember that when initially starting the program if there was no “wand” detection then the initial video windows would not work. Basically a fully dark camera view with no reflection will cause an issue. Could that be the problem.
LikeLike
Even with a wand in view on startup I can’t get the program to auto-start. 😦
LikeLike
Ah, Tim. Let me back up and try to be a little more clear. the terminal window doesn’t open to even give the trainedwpins script a chance to run through it’s initial startup, let alone even try to start tracking a wand.
LikeLike
Matt, I’m just starting to look at collecting materials for this project. Have you tried or thought about different IR emitters to solve the problem of poor reflection from the Universal studio wands? Any suggestions on that side of the equation?
Thanks for this great Blog!
Matt
LikeLiked by 1 person
I used the JC 4pcs High Power LED IR Array Illuminator IR Lamp Wide Angle for Night Vision CCTV and IP Camera (Amazon.com, probably others too), The LED IR Array is powered by a DC Power Adaptor 12 V DC 2.1MM sold by sococo (also on Amazon)
Cost: $11.99 for the array and $4.90 for the 12V supply.
I removed the array from the case, and removed the light sensor which not helpfully turns off the LEDs when there is ambient light. I hot glued the camera to the back of the panel holding the 4 IR LEDs, using the hole for the light sensor as a view port for the camera.
While this gave me a great deal of IR, the reflectivity of the wand is still an issue. I would like to have the lamp under normal lighting conditions but I’m not sure this is possible. My memory of Diagonally at Universal is that it is very dimly lit.
I have not yet had a chance to adequately test this out, if you do try it I’d like to know if you have problems.
You can see pictures of my light source at https://github.com/Breidenbach/ollivanderslamp.
LikeLiked by 1 person
In your trained.py, I got back this error
Traceback (most recent call last):
File “/home/pi/pi_to_potter/trained.py”, line 77
if args.bgsub then:
^
SyntaxError: invalid syntax
LikeLike
Ran into this thread on little bits: http://discuss.littlebits.cc/t/harry-potter-spell/5582
Much discussion on what wavelength is used at Universal.
I think 850nm is what seems to be the one which lines up with the LED array you have. Has anyone tested different wavelength LEDs to see if there is a difference in reflectivity of the wand tip? I wonder if having the camera in behind the LED emitter might blind the camera?
LikeLike
I have made an assembly of the IR array and camera (details of the array are at https://github.com/Breidenbach/ollivanderslamp). Without the diffusers the array does not block the camera.
LikeLike
That’s awesome! Well done.
LikeLike
It appears that the logic is fairly simple – that tracking begins as soon as the wand is detected. But is this the desired action? The wand will be detected as it enters the field of view and not at the beginning of a spell. Wouldn’t this confuse the algorithm and make a lot of false negatives? I’m thinking that after the wand is detected, the algorithm should wait for the wand to be stationary for a short time, followed by action that defines a spell.
LikeLike
That’s a good idea. You are right that there are a lot of false starts. I was also thinking it might be important to provide some sort of feedback. Either through audio or a hidden led matrix that might show the user where they are.
LikeLike
Hello, I’m hoping you can help me with this. I’m running the training.py file and am receiving the following traceback error:
File “trained.py”, line 303, in
t.do_run = False
NameError: name ‘t’ is not defined
t sure looks like it’s defined further, but I’m a beginner with all of this and could easily be missing something. Any ideas?
LikeLike
Hmmm. Are you running with Python 2? Any other error messages higher up? Seems like the Thread wasn’t created for some reason… so perhaps there is some other error?
LikeLike
Thanks for the reply! I’m running 2.7.13. It will print:
Initializing point tracking
False
False
About to start
Training set…
and then it runs through all the pictures, labels, indexes, lookup, before spitting out the name error…
LikeLike
I just started this project this weekend. I’ve gotten OpenCV going and am able to get tracking images / spells triggered with the rewritten code. But I encountered the same error running the trained version. Did you ever solve this? I’m working on getting pins added (for the internet button) to the working version since I couldn’t get thit newer trained script to run.
LikeLike
Oh! I think I figured it out. Something is bailing in TrainOcr. Probably the relative path doesn’t exist. Let me see if I can fix it….
LikeLike
In the near term. Make sure you are in the path: /home/pi/pi_to_potter. Also make sure the Pictures directory exists there.
LikeLike
Fixed. Made it figure out where the script is, and then use that as the path for ./Pictures.
To get the updated code make sure to do a: git pull
That should get you the updated code. The error came from within the thread, so there wasn’t an appropriate error message.
LikeLike
You are a really on top things! When I get a second, I’ll image my SD card where I’m at and try a second setup with your trained version. Higher learning curve on that one anyhow. I have a functional unit now after adding the pins to your rewritten script, so I’m not breaking it just yet. Lol
LikeLike
Hey Sir,
i’m at the point where you say to just update the “spells” section with what is needed… which pins are the “trinket” pins or the nox pins. i dont understand how to make a spell just turn on an LED attached to a gpio pin. my goal is to have several spells turn on and off different things attached to the gpio pins. i am not using the particle internet button.
also, for me, the only thing to work in the trained.py is a bright flashlight. i cannot get any reflections back to the pi-noir camera. even if i power a super-bright IR led from adafruit with a 9v battery and a resistor and point it straight at the camera, it barely shows up on the camera.
i have a harry potter themed halloween party coming up so i feel really under the gun to accomplish this. any help is much appreciated.
LikeLike
Hmmm. Sounds like you are having a couple of issues. The way this is supposed to work is that you have IR emitters pointed directly at the person doing the wand.
For me, when using the noir camera, even my finger will do for reflecting, if I’m within 6 inches or so. For that matter, my nieces toes were able to be used as well. 😉
So I’m guessing, you are using a raspi camera that has the IR filter in place. That IR filter is likely removing the IR light you are reflecting. (This is normal for cameras, the IR spectrum is taken out to improve picture quality.) . The NOIR pi camera comes without that filter, which allows it to work well for this.
So that is the first part… the second part controlling GPIOs.
Check out this article for how to use a GPIO:
https://www.raspberrypi.org/documentation/usage/gpio/
And
https://www.raspberrypi.org/documentation/usage/gpio/python/README.md
Then, if you want to control bigger stuff take a look at my article here:
AND
Finally the specific part of the code you will modify for recognized images is in the function (pi.write is one way to turn on GPIO pins):
def Spell(spell):
global prevSpell
if (spell == prevSpell):
return
prevSpell = spell
#Invoke IoT (or any other) actions here
if (spell==”center”):
print “trinket_pin trigger”
pi.write(trinket_pin,0)
time.sleep(1)
pi.write(trinket_pin,1)
LikeLike
Still no quite getting it.
I have added the following to the beginning of the rpotter.py file to set pin 12 to turn on and off the LED:
import RPI.GPIO as GPIO
GPIO.setmode(GPIO.BCM)
GPIO.setup(12,GPIO.OUT)
i then also added in the spells section:
elif (spell==”circle”):
print “circle”
GPIO.output(12,GPIO.HIGH)
time.sleep(3)
GPIO.output(12,GPIO.LOW)
this is supposed to turn on the LED for 3 seconds when i make the circle but it does not light up, nor does it print the word “circle” in the frame on the screen. using pi.write does not work for me. even if i try that in a separate .py file, i get “name error: name ‘pi’ is not defined”
I can get the led to turn on in a separate .py file (minus the elif and the print lines in the example above that is) so i know that they work but it does not work when i try to incorporate that in either the rpotter.py file or the trained.py file. what am i doing wrong? Do i need to put the gpio output and tim.sleep statements inside the quotes of the print command?
Sorry to sound dumb but i am not a programmer and this is very foreign for me.
lastly, in regards to the camera. i believe that mine does work with IR as it does see the purple ish light in it like my cell phone camera does. its just does not seem very bright at all. mine is the 2.1 camera version but has a green circuit board and all the others i see seem to have a black circuit board. so maybe i have the wrong one. i will order another camera with the attached IR LED’s on the sides. hopefully that will make a difference as well.
thank you for your help.
Jason
LikeLike
It sounds like you have everything ready then. If you have code the turns on the led you are good to go to use that like you have.
The only part that isn’t working is the IR camera. Since you see purple – I’m pretty sure that isn’t correct.
Also the “circle” output and recognition will never be seen until that wand pattern is picked up. You will know it is functioning when you start seeing a black window come up with “drag” recognitions for your wand. I’m sorry I’m not near my setup or I would take pictures of the various states.
LikeLike
i do see the drag recognitions pattern on the black window, so i know that the camera is working. what I am still unsure of is how to program what pin turns on from said named spell.
in your default rpotter.py what is the nox pin on the GPIO pins? or what is the lumos pin on the GPIO pins? or is it not setup to do that? if not, how do i set that up. can you give me the exact code for that?
thank you again.
Jason
LikeLike
Jason, are you running trained.py or trainedwpins.py?
LikeLike
OMG… Chris, thank you. that was where the disconnect was.This whole time i was so focused on the trained.py or rpotter.py that i did not even take a look at the trainedwpins.py file. … now it makes sense to me.
thank you so, so much.
woo hoo!
LikeLike
Chip/Chris, you are awesome. Thank you for the help. Jason – congrats on figuring it all out.
LikeLike
First of all I want to thank you for your efforts and of course Sean O for the original post. I am working with my 11 year old on a school project. We found this after he was intrigued by the Harry Potter world at Universal. He is a big fan and decided to do his science project Harry Potter Themed. With my help getting the Pi loaded and compiled he has taken on the initiatives to learn the circuitry, logic, and a bit about the OpenCV technology (as much as an 11 year old brain can) He has learned so much from this project it’s great to watch. He is using the logic to turn on some LED’s and output audio. He recently trained the unit to detect a number “2” gesture to output audio. During the training he captured about 15 images. However, other gestures are triggering the 2 output. I am curious if there are some assumptions being made regarding the image capture. I am letting him work through the troubleshooting and figure out how he wants the final project to look but I would like to explain to him why a circle on the screen is triggering the 2. Thanks for your help
LikeLike
Hi Charles! I’m impressed with your son!
For the Machine Learning explanation… think of it this way. We are basically trying to create a filter automatically. This filter’s job is to sort something new that comes in, into the slot that is closest to one of our training sets of images. The process of creating that filter is fuzzy and not exact. It takes a set of pixels, and for each collection of pixels in the new one, tries to get as close to some set of the old pixels provided in the training – and more samples that are similar increase the likelihood something will match. The problem with 2 looking like 0, is probably because the training dataset has curved examples, that are really close to the 0 samples, the 0 has more of the ones that are close to your 2 than the 2 sample set has.
To fix it, you need to tune the samples in the 0 dataset and the 2 dataset, so that they are more distinct from each other. In other words, remove files in the 0 that are too close to the 2 and place more samples of the 2 that look close in the 2 folder.
You’ll notice that in my sample set, I specifically chose things that would seem very distinct for the filter. Its a fuzzy match, so as the engineer you need to help ensure that the fuzzy part of the filter has as distinct slots as possible.
That’s why I have “triangle” and 0… very distinctly different. 2 and 8 are really really close, so hard to distinguish. 2 and 0 aren’t that close… but you might be having trouble with when the image is taken too.
Sounds like you both are learning a lot!!! Congrats on getting this far. Its a wild open world if you can do this stuff. 😉
LikeLike
Hi, in your opinion, what is the best way to have the pi place a sound file as it is doing the “spell”? is there a particular file type that works better? like mp3 or wav?
thank again.
Jason
LikeLike
Wav is usually easier. Then you can use “aplay” on the command line.
LikeLike
I managed to get the trainedwpins.py working on a Pi Zero. It seems sluggish but I’m not using a reflective wand but a TV remote to send IR signals. Will be trying a reflective test later today. Thanks once gain for supplying the code. I have added my hooks for Neopixels which I’m testing now. Here’s my version of the code for your reference:
https://gitlab.com/robboz4/my-harry-potter-control
LikeLike
Well done! I wouldn’t have even attempted on a PI Zero – nice to know its possible!
LikeLike
Like I said it seems sluggish. I actual got the center command to turn on the lamp. I made any command turn on the lamp to help debug. But I ran out of time as my Granddaughter arrived early. So will try a Pi3 before her next visit and perhaps stronger IR transmitters. The gitlab link has the code for a Python3 version that successfully ran on the Pi Zero. Big changes were the print statements and the indentation between tabs and spaces which I caused.
Cheers
LikeLike
Hi,
Would you be able to upload an .img file of the sd card with everything on it, so we could use balenaEtcher and load this with everything preinstalled onto a raspberry pi 3b and not have to spend hours loading opencv. That would be so awesome of you if you could. Thank you
LikeLike
I’ll see what I can do, I’m running it fresh with this in mind. I’ll reply if I manage to get a huge ISO up. The trouble with these isos is that your disk needs to be greater than mine… and it will be the whole 16Gs (my current disk).
LikeLike
By the way, I ask this because after a year of trying to get this to work, even following your steps I get this:
[ 11%] Generating precomp.hpp.gch/opencv_core_RELEASE.gch
In file included from /usr/include/c++/6/bits/stl_algo.h:59:0,
from /usr/include/c++/6/algorithm:62,
from /home/pi/opencv-3.1.0/modules/core/include/opencv2/core/base.hpp:53,
from /home/pi/opencv-3.1.0/modules/core/include/opencv2/core.hpp:54,
from /home/pi/opencv-3.1.0/modules/core/include/opencv2/core/utility.hpp:52,
from /home/pi/opencv-3.1.0/build/modules/core/precomp.hpp:49:
/usr/include/c++/6/cstdlib:75:25: fatal error: stdlib.h: No such file or directory
#include_next
^
compilation terminated.
modules/core/CMakeFiles/pch_Generate_opencv_core.dir/build.make:62: recipe for target ‘modules/core/precomp.hpp.gch/opencv_core_RELEASE.gch’ failed
make[2]: *** [modules/core/precomp.hpp.gch/opencv_core_RELEASE.gch] Error 1
CMakeFiles/Makefile2:2182: recipe for target ‘modules/core/CMakeFiles/pch_Generate_opencv_core.dir/all’ failed
make[1]: *** [modules/core/CMakeFiles/pch_Generate_opencv_core.dir/all] Error 2
Makefile:160: recipe for target ‘all’ failed
make: *** [all] Error 2
pi@raspberrypi:~/opencv-3.1.0/build $
A working .img that I could flash, so I could just work on the hardware would be a godsend.
LikeLike
-DENABLE_PRECOMPILED_HEADERS=OFF
Hi David, I just went through the whole process again, from scratch to see what might be up.
Turns out there is a new flag you need to add to get past this issue. The flag I pasted in above should do the trick, but I’m currently still compiling (though that flag got me past the issue you found.) So give it a whirl.
To be even more clear the commands you need to rerun are:
cd ~/opencv-3.1.0/
mkdir build
cd build
cmake -D CMAKE_BUILD_TYPE=RELEASE \
-D CMAKE_INSTALL_PREFIX=/usr/local \
-D INSTALL_PYTHON_EXAMPLES=ON \
-D OPENCV_EXTRA_MODULES_PATH=~/opencv_contrib-3.1.0/modules \
-D BUILD_EXAMPLES=ON .. -D ENABLE_PRECOMPILED_HEADERS=OFF
Then continue with the make command.
LikeLike
Yup. That was the trick. I got it running again. This time I didn’t use PiBakery and instead started with a raw iso of Desktop Raspbian – but I think that is insignificant. Now… lets see if I can host a *huge* image somewhere…. 🙂
LikeLike
I was able to use the latest python, opencv4 and some reworking of the code; adding parenthesis to print statements and changing indentations to 8 spaces and am getting the program running. I am going to make an .img for people as well. It has been a great learning process for a novice. Thank you for keeping this project active. And responding so quickly. Now onto figuring out how to get the wand to control a motor.
LikeLike
That is great to hear!!! I didn’t even know there *was* an OpenCV 4. Well done! Sounds like it’s been a long journey. (:
Let me know if you need help with motor control. Pololu.com has been my go-to for all things brushed motors.
LikeLike
pi@raspberrypi:~/opencv-3.1.0/build $ cmake -D CMAKE_BUILD_TYPE=RELEASE \
> -D CMAKE_INSTALL_PREFIX=/usr/local \
> -D INSTALL_PYTHON_EXAMPLES=ON \
> -D OPENCV_EXTRA_MODULES_PATH=~/opencv_contrib-3.1.0/modules \
> -D BUILD_EXAMPLES=ON .. -D ENABLE_PRECOMPILED_HEADERS=OFF
CMake Error: The source directory “/home/pi/opencv-3.1.0/build/ENABLE_PRECOMPILED_HEADERS=OFF” does not exist.
Specify –help for usage, or press the help button on the CMake GUI.
LikeLike
cd ~/opencv-3.1.0/
mkdir build
cd build
cmake -D CMAKE_BUILD_TYPE=RELEASE \
-D CMAKE_INSTALL_PREFIX=/usr/local \
-D INSTALL_PYTHON_EXAMPLES=ON \
-D OPENCV_EXTRA_MODULES_PATH=~/opencv_contrib-3.1.0/modules \
-D BUILD_EXAMPLES=ON .. \
-D ENABLE_PRECOMPILED_HEADERS=OFF
Looks like a copy and paste error. (: The space in your command is “escaped” with the slash and there fore removed and seen as part of the “..” path.
LikeLike
oooh. And that’s a little weird. The path should be at the very end…
cd ~/opencv-3.1.0/
mkdir build
cd build
cmake -D CMAKE_BUILD_TYPE=RELEASE \
-D CMAKE_INSTALL_PREFIX=/usr/local \
-D INSTALL_PYTHON_EXAMPLES=ON \
-D OPENCV_EXTRA_MODULES_PATH=~/opencv_contrib-3.1.0/modules \
-D BUILD_EXAMPLES=ON \
-D ENABLE_PRECOMPILED_HEADERS=OFF ..
Fixed in the checked in file.
LikeLike
nevermind my last comment… I just figured out what you were saying
LikeLike
Can you explain to me the OCR http: site you placed at the end of the steps taken text file? Did you incorporate it into this project?
LikeLike
Nope, that was an experiment. Didn’t need it with the code that allowed for training.
LikeLike
I wanted to follow up as you all have been so helpful. My 6th grade son took on this project for his school Science Maker Mania project. I posted a few comments/questions above. It took some doing but he really did most of the heavy lifting with me encouraging him with either carrot or stick along the way. One thing I wanted to add was that his camera did not work well in his first demonstration due to it being too bright in the room. After some research we were able to adjust the balance and contrast of the camera in opencv to help pick up the reflective wand. In all it worked out great at the science fair night. He built an enclosure with a window that had LED lights mounted and installed a speaker on top of the enclosure for sound as an output. Everything worked as planned
His teacher on the other hand could not figure out what was built and gave him a terrible grade. I had to get involved and explain that in today’s day and age we no longer need to build clocks from potatoes and then had to lay out the 100 hours of work, reading, research, and execution that was done by an 11 year old to take a piece of plastic and move it around to turn on lights and/or sounds. His grade only went up slightly but I am still extremely happy with what he accomplished whether his teacher understands it or not. I wanted to post up here another thank you as well as the positive outcome. If I could I would post photo’s/videos but I don’t see an option.
Thanks
LikeLike
This is amazing!!! Your son should be extremely pleased. He now has a fundamental and practical understanding of image processing and machine learning – a better understanding than 95% of the human race.
It is sad that the teacher would effectively be discouraging this type of understanding as its seen as one of the brightest(if not *the* brightest) and highest paying careers in technology. I regularly work with technologists across the spectrum and can tell you that someone tracking these skills, at this age… will be extremely valuable when they are of hiring age.
You can tell your son – this is coming from a former Amazon, and Google Engineer currently working in robotics who has 78 issued patents. Take lots of pictures. Especially of the smiles, and consider it part of his life-long resume. 😉
Thank you for sharing… this kind of experimentation and learning is why I write these up.
LikeLike
I would like your help with a motor script. So if I the movement of a servo is 0 to 180 degrees and I want it to start at 0 and go to 110 degrees here is my script.
import RPi.GPIO as GPIO
import time
GPIO.setmode(GPIO.BOARD)
servoPin=11
GPIO.setup(servoPin, GPIO.OUT)
pvm=GPIO.PWM(servoPin,50)
pvm.start(2)
for i in range(0,110):
DC=1./18.*(i)+2
pvm.ChangeDutyCycle(DC)
time.sleep(.05)
for i in range(110,0):
DC=1/18.*i+2
pvm.ChangeDutyCycle(DC)
time.sleep(.05)
pvm.stop()
GPIO.cleanup()
Now what the next step to place this properly in the trinket spell slot, with the center motion?
LikeLike
Would there be a way to create background elimination to create a foreground mask? And blob detection function detects the wand tip as a ‘blob’ and eliminates all other motion traces?
LikeLike
There are a couple of ways, but I haven’t worked on it. If you want to start doing the research, I would use an image, as known background. Then subtract that image from the frames coming in. That way *only* different pixels would be considered.
If you do this, you might want to come up with a scheme to refresh that image every once and a while… perhaps on restart.
Good luck!
LikeLike
Well I found out that motor script won’t work for this project. I switched over to a pigpio script to control the motor. But same question. Could you show how to add a servo motor script to the trinket slot. I’m having a bit of trouble figuring out the correct scripting.
Thank you
LikeLike
Hi David!
To get your motor to work. Make sure you have the includes at the top of the file. Like this:
import pigpio
Right below that, setup your pins appropriately:
pi = pigpio.pi()
pi.set_mode(23, pigpio.OUTPUT) # Just guessing on pin 23 for you.
Make a little function to hold your motor code. Something like this (Make sure to get spacing right for indentation – python cares about this):
def MoveMotor() :
pi.write(23,0) #This should be removed and replaced with the code you discovered.
time.sleep(1) #.
pi.write(23,1) #.
Then in the code below where you placed this function, but inside the code for Spells here:
def Spell(spell):
… # other lines of code exist…
if (spell == “center”): # This line should already be in your code.
print “I am triggering your motor!!!!”
MoveMotor() # This is where your new function will be called… moving the motor.
elif (spell == “circle” || spell == “square”):
print “doing something else….”
… # other lines of code exist
-Matt
LikeLike
Hi Matt,
Thank you for all your help. I am using a servo motor to open a box. As I am sure you have gleaned, I am new to python and this project is a steep learning curve for me. But when I start something, I finish it to the hair pulling end. I found a pigpio servo motor code that works and I could play with as a starting point. I tried inserting it into your code.
Here is the code so far:
https://github.com/thechildstheatre/potter
I am getting this error when I run the trainedwpins.py code now.
Traceback (most recent call last):
File “trainedwpins.py”, line 21, in
pi.set_mode(32, pigpio.OUTPUT)
File “/usr/local/lib/python2.7/dist-packages/pigpio.py”, line 1340, in set_mode
return _u2i(_pigpio_command(self.sl, _PI_CMD_MODES, gpio, mode))
File “/usr/local/lib/python2.7/dist-packages/pigpio.py”, line 975, in _u2i
raise error(error_text(v))
pigpio.error: ‘no permission to update GPIO’
All help accepted and appreciated. I will continue my python and opencv tutorials in the meantime.
Thanks again!
LikeLike
I simplified to pigpio code and got it to work. My wand can now open a box 🙂
LikeLike
That should read I simplified the python code using pigpio to control the servo motor to open a box and got it working. I have opened and closed a box with my wand now:)
LikeLike
Congratulations!!! Sounds super cool! I feel like we are in in the age of magic now… And for those of us that can control it, magic boxes that sing and open at the flick of our wand are just the beginning. Congrats again!
LikeLike
Your help is the key. Thank you for responding.
LikeLike
A question on getting the program to autoboot on pi startup. I have gone through many tutorials and blogs online to try and get the wand program to startup headless and automatic at bootup. With the newest raspbian stretch, I cannot seem to get it to do it. And words of advice or a perfectly worded tutorial would be greatly appreciated. They have pulled the .config file you mentioned earlier from the stretch update.
LikeLike
When you say headless… are you still installing the desktop on your raspbian? Or are you installing raspbian lite? The reason I ask is that, even if there isn’t a screen, the desktop environment is currently required for any of the “cv2.imshow(“Original”,…)” calls.
So, your first attempt could just remove any line that looks like that.
If you’d like to keep those calls…
I believe the new location of the config file is:
/etc/xdg/lxsession/LXDE-pi
And you can add your own override by adding the “.config” yourself, and then simply copying the path from “lxsession” forward into that .config directory of your home.
Let me know if that doesn’t do it. I can try going through it myself to get you unstuck.
LikeLike
I got the program to run at boot, but it says:
Initializing point tracking
False
False
About to start
Training set…
and then it runs through all the pictures, labels, indexes, lookup, before spitting out the name error
t not defined.
This doesn’t happen if I run it from the desktop only on autoboot.
LikeLike
Sounds like something is throwing an exception during the training phase… Likely this means there is an incorrect path at start of the script. Lemme see if it’s possible to inform the code of the path to get the training data…
LikeLike
By the way, your wizard’s fire is Sweet!!!
LikeLike
Thanks! 😉
LikeLike
I figured out what was happening. It was looking at the pi picture folder instead of the the training set picture folder. I set a pathway for it in the code and got it to run at boot correctly. Keep up the cool projects!
LikeLike
Nice work!!!
LikeLike
Great work mamacker! I wanted to share my take on this with you, as your code helped significantly: https://www.adamthole.com/control-smart-home-with-magic-wand-video/ Thanks again, and keep up the great work!
LikeLike
Yay! Glad to see it in action! Hope the kids had fun.
LikeLike
Great work!
I wanted to share my take on this with you, as your code helped significantly: https://www.adamthole.com/control-smart-home-with-magic-wand-video/
Thank you, and keep up the great work!
LikeLike
I am trying to figure out background subtraction to get rid of the pesky nonmoving background lights or reflections of light sources. I’ve watched some tutorials and blogs on MOG2. I am just not sure how and where to implement it in this code. Any feedback, suggestions, or code welcome. I am working off of the trained wpins code you wrote.
LikeLike
You are in luck! I wanted to do the same thing. Check out:
https://github.com/mamacker/pi_to_potter/commit/0121e42eca130e80ee9a220c035fe90b4b3a29a4#diff-52de70ae784a9ac6df4fd47381cc2520
That is where I added background subtraction to the trained… sorry I haven’t done it with pins yet. But that should should you where the changes need to me made. Specifically line 21 and line 179 in that change.
LikeLike
Awesome! That is definitely a step in the right direction. I tested it in our dining room with some picture frames in the background. Still getting artifacts, but I can see the direction it’s headed. Maybe with blob detection as well. Just trying to figure out how to get only the wand tip to be tracked. Thank you for the new code! It is such a fun project to play with.
LikeLike
I am going to play with the threshold tomorrow and see if I can get rid of the artifacts. Thanks again for all the work!
LikeLike